Component attributes
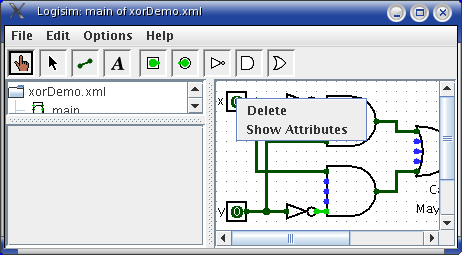
The attribute table allows you to examine and probe
attributes for a component. To do this, pull up a component's popup menu
(right-click or control-click it), and choose Show Attributes.
We might, for example,
choose to view the attributes for the x input of the
Beginner's Tutorial's XOR
circuit.
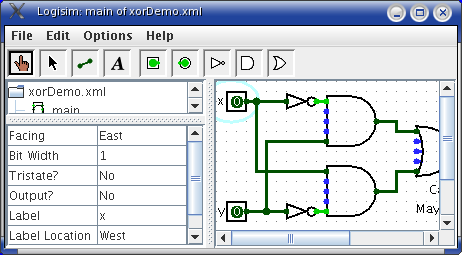
 After choosing Show Attributes, that pin's attributes will appear in the
attribute table, and in the
canvas Logisim will draw a very pale teal oval around the component to indicate
whose attributes we are now viewing.
Among other things, the pin's attributes say that the pin is facing
east, that it is not an output pin, and that its label is "x."
After choosing Show Attributes, that pin's attributes will appear in the
attribute table, and in the
canvas Logisim will draw a very pale teal oval around the component to indicate
whose attributes we are now viewing.
Among other things, the pin's attributes say that the pin is facing
east, that it is not an output pin, and that its label is "x."
 Incidentally, besides using its popup menu, you can also view a
component's attributes by poking it (
Incidentally, besides using its popup menu, you can also view a
component's attributes by poking it ( ) or selecting it (
 ).
).
Each component type has a different set of attributes; to learn what they
mean, go to the relevant documentation in the
Tool Reference.
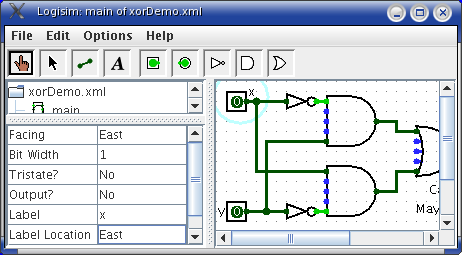
You can change most attributes of components in the circuit through
editing them in the attribute table. For example, suppose we decide that
we'd rather that the label x appear on the other side of the
pin. To accomplish this, we choose East from the Label Location
attribute.
 Not all component attributes are editable, though. One example of this
is the AND gate's Gate Size attribute. You can change the
value of this attribute for the AND gate tool, but you cannot change the
value for an AND gate that has already been created.
Not all component attributes are editable, though. One example of this
is the AND gate's Gate Size attribute. You can change the
value of this attribute for the AND gate tool, but you cannot change the
value for an AND gate that has already been created.
Next: Tool attributes.